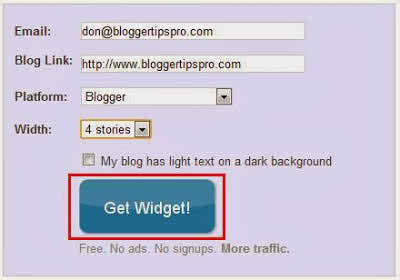
The steps to adding this feature are so simple that it only takes a few minutes to get a great looking extra look-and-feel without much effort. Start by navigating to LinkWithin.com. Right away you'll see the starting point by entering your information into the widget form on the main page like this:
As you can see all I did was enter my email, link address, Blogger as the platform and 4 stories. From there click the 'Get Widget' button to continue. You'll see a dialog that looks like this:
Click the Install Widget link that will open Blogger into a new window. You'll see the Blogger dialog pop up that prompts you for a blog name and widget title. Be sure to select the right blog if you have a number of them. You can also add the widget title (but I chose to leave it blank):
Just click 'Add Widget' to add the related posts to your blog posts. What happens next is that LinkWithin will add an HTML widget to your Layout that will automatically add the related posts to all of your blog posts. You'll see it in your main blog Layout menu page like this:
The widget will be an HTML/Javascript most likely added to the right side of your layout. I've only tried this on the standard static Blogger templates and don't know if this works with the Dynamic templates. However, I think it should work.


Post a Comment